MINT SPONGE CAKE WITH LIME CREAM

Ingredients for the Sponge Cake

  • 250 g of flour
  • 240 g of sugar
  • 130 ml of water
  • 120 ml of extra virgin olive oil
  • 85 g of mint syrup
  • 3 eggs
  • 1 sachet of vanilla
  • 1 sachet of yeas

Ingredients for lime cream

  • 500 ml of full milk
  • 100 g of cane sugar
  • 50 g of flour ‘00’
  • 3 eggs
  • Grated lime peel

A cream sponge cake is one of the best loved desserts by both adults and children. Here we present a tasty variation: sponge cake with mint and lime cream
Thanks to the LIFE blast chiller, the sponge cake and the cream can be preserved for longer while retaining its full taste. Moreover, during the cooling process, immediately following the baking of the dessert, it will not be exposed to temperatures between +65°C and +10° which is normal for food left to cool to room temperature; the perfect temperature range, in fact, for bacteria to proliferate, and for a deterioration in quality to occur.


PREPARATION OF THE SPONGE CAKE
Stir the eggs, together wth sugar, for about 3 minutes until the mixture is of a consistent texture. Add the extra virgin olive oil, water and, little by little, the flour, vanilla and yeast. Continue to stir until all the ingredients have been fully incorporated into the mixture, then add a few drops of mint syrup.

Butter and flour the silicone mold for single portions, and half-fill the molds with the mixture.
If you don’t have the mold you can use small trays or molds for muffins

Place in the oven and cook at 180°C for about 40 minutes
While the sponge cake is cooking pre-cool the LIFE blast chiller to -15°C

When the cooking has finished remove the molds from the oven and, after about 2 minutes, place the sponge cake into the LIFE blast chiller. Start the program BLAST CHILLING>DESSERT>SPONGE CAKE using the temperature probe. As soon as the program has finished the blast chiller will notify with you an beeping sound.


PRERARATION OF CREAM
Blend the brown sugar, flour and lime zest: then add the milk and eggs.
When the ingredients have been perfectly blended into a consistent mixture cook in a bain-marie for 30 minutes on a low flame. Continue to stir to prevent the formation of lumps until the custard is ready.

Pre-cool the LIFE blast chiller to -15°C.

Pour the custard into a low tray and start the program BLAST CHILLING>DESSERT>CREAM
When the program has finished fill the sponge cake with the custard and decorate.
Buon Appetito!



CHOCOLATES WITH PISTACHIO AND HAZELNUTS GRANULES

INGREDIENTS

  • 400 g of chocolate fondant 60%
  • 20 g of hazel nut granules
  • 20 g of sweet pistachio granules

With the LIFE blast chiller you can make delicious chocolates worthy of the best confectioners, in the comfort of your own home! The crystalisation process takes place very rapidly and at the perfect temperature to render the chocolate shiny and crunchy. A chilling temperature which is too low, will in fact, compromise the result marking the surface and creating unpleasant butter and cocoa stains

PREPARATION

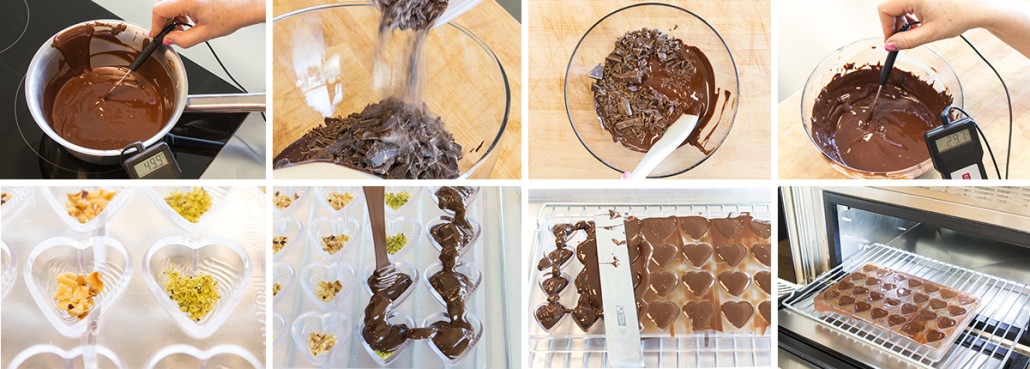
Finely cut and melt the 280 g of chocolate on a low flame until a temperature of 49°C/50°C is reached.
This operation of heating and chilling, known as tempering, is needed in order to dissolve the molecules of butter and cocoa.

Before pouring the tempered chocolate into the molds, place them on a LIFE blast chiller rack. Use a tray, placed underneath the racks, to catch any excess chocolate that may drip from the molds.

Sprinkle hazelnut and pistachio granules in the mold

Fill the mold with the chocolate and spread uniformly, with the help of a flat spatula.
Put the mold into the LIFE blast chiller and activate the function CHOCOLATE at +12°C for 20 minutes.

At the end of the program the chocolate will have crystallized, turn the mold upside down, and detach the chocolates…the moment to astound your guests has arrived!


Abbattitore_Casalingo_abbattitore_domestico_abbattitore_casalingo_coldline_cioccolatini_fatti_in_casa2


CHOCOLATE CUPCAKES WITH SOFT CENTRES

INGREDIENTS

  • 100 g of chocolate fondant
  • 100 g of butter
  • 80 g of sugar
  • 10 g of unsweetened cocoa powder
  • 10 g of flour
  • 2 eggs
  • Icing sugar

With the LIFE blast chiller you can make fantastic chocolate cup cakes in only 18 minutes! Thanks to the microcrystallisation which takes when deep freezing dough at -40°C it can be transferred directly from the freezer to the oven, providing you with results, worthy of a professional chef!

PREPARATION

Pre-cool the LIFE blast chiller to -10°C

Melt the chocolate in the bain-marie, add the butter and the sugar and mix until the ingredients are fully integrated.
Blast chill the mixture, using the temperature probe: BLAST CHILLING>DESSERT>MOUSSE

When the blast chilling program has finished remove the tray and pre-cool the blast chiller to -15°C
Add one egg at a time to the blast chilled chocolate and whisk. Continue to whisk the mixture for several minutes adding the cocoa powder and sieved flour.

When the mixture is homogenous pour it into floured and buttered single-portion molds, then freeze using the program: DEEP FREEZING>DESSERT>MOUSSE

After the completion of the program the cup cakes can be stored in the freezer

To serve, simply cook in the oven for 18 minutes at 200°C, then delicately remove from the molds, paying careful attention not to break the cakes. Sprinkle them with icing sugar and let yourself be seduced by the creaminess of their chocolate heart.

We recommend that you use double or triple the amounts of the ingredients so as to prepare more cup cakes, thereby providing a large stock of desserts that you can cook whenever you wish. Thanks to the LIFE blast chiller you will not only save yourself time, but will leave your guests open mouthed!


Abbattitore_Casalingo_abbattitore_domestico_abbattitore_casalingo_coldline_tortino_cioccolato_cuore_morbido2


YOGURT

INGREDIENTS

  • 1 lt of pasteurized milk
  • 100 ml of yogurt
  • Raspberries
  • Blueberries
  • Cereal


The LIFE domestic blast chiller allows you to make yogurt in your home – and it’s easier than you could ever imagine!
A light and nutritional food which improves our health and can also be consumed by people who are lactose intolerant.
By preparing yogurt at home you will be able to choose the best milk, which fruits you wish to include and whether or not to add sugar: you will always have your breakfast and healthy snacks ready in seconds.

PREPARATION

Pour the milk into the tray GN ½ or a wide receptacle, add the yogurt and stir for about a minute.
Place the tray in the LIFE blast chiller, connect the probe and add the milk.

Select the function YOGURT>AUTOMATIC and start the program.
We advise you to use the LIFE blast chiller overnight so that it is free during the day.

When the yogurt is ready it will be chilled to +3°C and you will find it fresh and tasty.
At the end of the cycle pour the yogurt into a dish, and add the cereal, blueberries or raspberries.

Yogurt made with the LIFE domestic blast chiller can be preserved in the freezer for up to 10 days.
While some of the yogurt may be kept and consumed at a later date, part can be used to prepare another batch.


TRICOLOR PIZZA

INGREDIENTS

  • 500 g of flour ‘W’
  • 300 g of water
  • 15 g of salt
  • 4 g of yeast
  • 3 spoonfuls of extra virgin olive oil
  • 100 g of tomato paste
  • 2 mozzarella, 125 g
  • 8 fresh basil leaves
  • Origano
  • salt
  • sugar


Pizza, which more than any other dish, defines the Italian kitchen, is now a candidate to become a world heritage dish, ensuring that the recipe will never be forgotten! Thanks to the proving function on the LIFE domestic blast chiller you will be able to produce excellent quality pizza every day of the year, regardless of the humidity and the weather, choosing the temperature and the duration of proving process – just like a professional chef.

PREPARATION

Pour the water into a bowl, add salt and stir. When it is completely dissolved add the flour and mix for a few minutes, then add the yeast and the extra virgin olive oil.

Knead the mixture for about 10 minutes.

The dough should be soft and moist, but shouldn’t stick to your hands. If necessary add a little more flour, and roll into balls. Start the program PROVING>IMMEDIATE, set at a temperature of 28°C for 3 hours.

After the first proving, divided the dough into 2 equal parts, and place them in the tray you will use to cook them.
Start the second proving program: PROVING>IMMEDIATE, at +28°C for one hour.

In the meantime, heat the tomato paste for a few minutes, add a pinch of salt and, if necessary, a teaspoonful of sugar, to reduce its acidity.
Thinly slice the mozzarella.

Pre-heat the oven to 225°C and, at the end of the leavening process, dress the pizza with the tomato paste, the mozzarella, the fresh basil leaves and a little extra virgin olive oil. It is up to you whether or not you wish to sprinkle the oregano on the pizza before or after it has been cooked.
Cook in the oven for 15 to 20 minutes at +225°C.

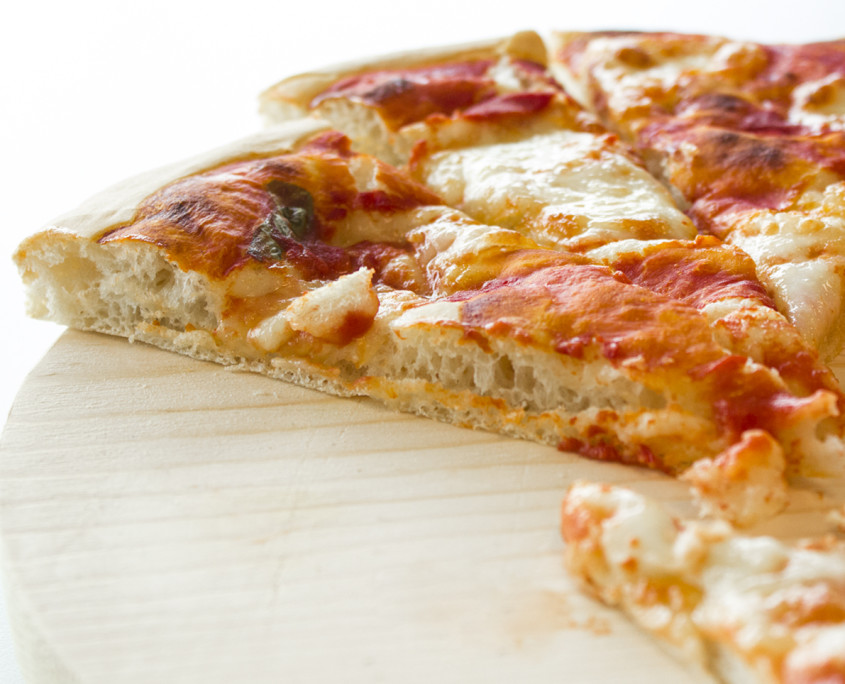
Thanks to the LIFE domestic blast chiller, the pizza will have leavened perfectly and you will observe that air pockets have formed inside the pizza’s base.
Buon Appetito!

Abbattitore_Casalingo_abbattitore_domestico_abbattitore_pizza2

.

CHICK’S BRIOCHE BREAD

INGREDIENTS

  • 650 g of manitoba flour
  • 250 g of whole milk
  • 100 g of sugar
  • 100 g of butter
  • 10 g of yeast or 50 g of dried yeast
  • 4 eggs
  • 1 sachet of vanilla
  • Salt

For garnish

  • 1 egg yolk
  • Granulated sugar
  • 50 g of whole milk


To celebrate the arrival of spring we have prepared this fun and tasty recipe: ‘il pulcino di pan brioches’, which thanks to the LIFE blast chiller, is quick and simple to make. The proving function will help you save a lot of time, and provides the perfect conditions for the yeast to develop.

PREPARATION

Heat the milk until it reaches a temperature of +37°C, then add the yeast and sugar. Stir until fully dissolved.

Pour into a bowl or a planetaria. Paying close attention that lumps do not form, slowly add the sifted flour, the eggs, butter, vanilla and a pinch of salt. Stir for a few minutes until the mixture is soft, but not sticky. If necessary add a little more flour.

With a rolling pin flatten the pastry so that it is thin long and narrow. Now fold the pastry upon itself so that it forms several layers.

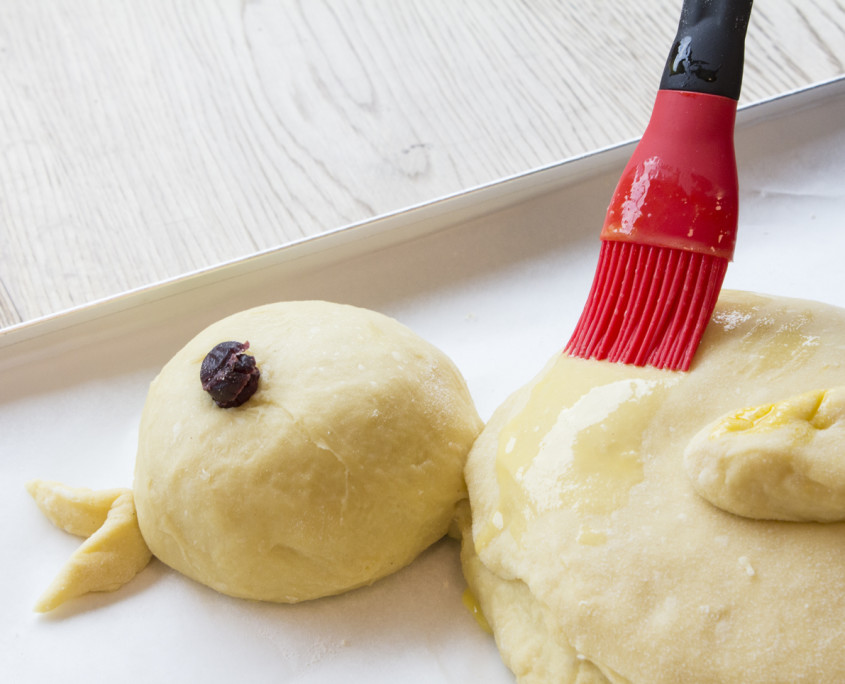
Separate it into two circular parts, one large and one small: the larger part for the chick’s body, the smaller for its head. Use a small amount of pastry to make its feet, wings and beak.

Place the shaped pastry on one of the LIFE basket chiller’s trays, that has been lined with baking paper, leaving a 2 cm space between the chick’s head and body.

Place the tray into the LIFE blastchiller and set the program: PROVING>IMMEDIATE at a temperature of +28°C for 2½ hours and press START

If you wish to prove the pastry at a later time (up to 24 hours), program the LIFE blast chiller in the same way, but add time you want the program to start.

At the end of the proving program brush the pastry with the egg yolk, milk and sugar, add a dried blueberry or a raisin for the chick’s eye and cook for 15 minutes at 175°C


Abbattitore_temperatura_abbattitore_pulcino2


.


VENERE BLACK RICE WITH BRAISED VEGETABLES

INGREDIENTS

  • 200 g of Venus rice
  • 2 courgettes
  • 2 carrots
  • 1 red pepper
  • 1 yellow pepper
  • Salt
  • Extra virgin olive oil
  • Dried oregano


Rice salad is a great solution for lunch or dinner when you have company, but the risk of serving it overcooked is an ever present concern. However, there is a simple and unique solution to ensure that the rice arrives at the table cooked perfectly ‘al dente’: with the LIFE domestic blast chiller it can be chilled to 3°C. The rice can be divided into portions and deep frozen at -40°C, ready for when you need it. It can be defrosted in a few minutes, and it will taste as if it has just been freshly prepared!


PREPARATION

Bring a pan of water to the boil and add cooking salt and cook the Venere rice as per the instructions on the pack.
Meanwhile wash the courgettes and peppers, dice and put into a bowl and add a little extra virgin olive oil, a pinch of salt and handful of dried oregano.

Ten minutes before the rice has finished cooking pre-cool the LIFE blast chiller.
Drain the cooked rice and pour it into a steel bowl and start the program, BLAST CHILLING>RICE>BOILED RICE

Place the vegetables in a baking dish and cook in the oven at 200°C for 15 minutes. Chill the cooked vegetables in the LIFE blast chiller in order to maintain their nutritious crunchiness using the program BLAST CHILLING>VEGETABLES>DICED

When the rice and vegetables have been chilled, put them into a bowl and mix well and place in the fridge.
Serve with a drop of olive oil and some cooked ham.

If you wish to keep the rice for a longer period of time, divide it into single portions and deep freeze with the LIFE blast chiller. You can defrost the number of portions you need in just a few minutes, and they will taste as if they have just been freshly prepared!


BRIOCHES GIULY

INGREDIENTS

  • 750 g of manitoba flour
  • 250 g of full milk at room temperature
  • 130 g of courgettes
  • 100 g di burro
  • 100 g of butter
  • 1 sachet of vanilla
  • 4 eggs
  • 10 g yeast or 50 g dried yeast
  • Pinch of salt

INGREDIENTS FOR DRESSING

  • 1 egg yolk
  • Granulated sugar, to taste
  • 50 g of full milk


Breakfast is a very important part of the day, and homemade brioches are the perfect way to start it!
When you wake up in the morning you will find that the LIFE blast chiller has perfectly proved the dough, and after a few minutes cooking an irrisistable aroma will fill the kitchen.


PREPARATION


Pour the milk into a bowl or a planetaria, and add the yeast, the sugar and mix well until fully dissolved. Now add the flour, the eggs, the butter, the vanilla and a pinch of salt and stir gently for 5 minutes. If it it is too sticky add a little extra flour.

Cover the work top with a sprinkling of flour and flatten the dough with a rolling pin until you have a rectangular shape of approximately 50 cm x 20 cm.
Fold the dough back upon itself three times forming several overlying layers, paying attention not to break it.
Flatten some more dough into a 50 cm x 20 cm rectangle, and repeat the above process.

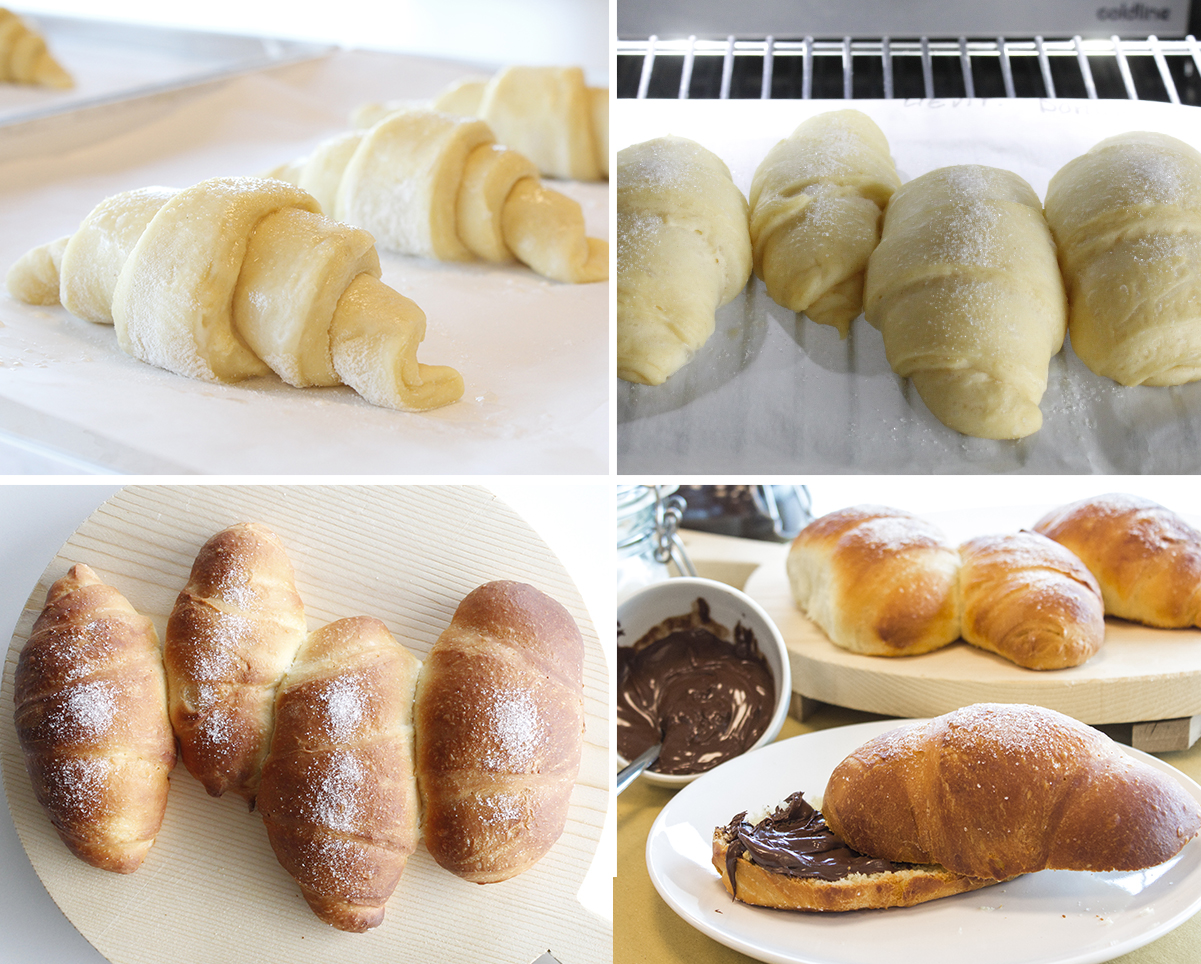
Using the flattened dough, cut out some triangles, base 10 cm, height 12 cm and roll, then, starting from the base, brush with a mixture of egg yolk and milk, prepared earlier, and sprinkle with sugar.

Place the brioches on a tray or on a rack, that has been covered with baking paper, and put into the LIFE blast chiller and activate the proving program: PROVING>IMMEDIATE at a temperature of 28°C for 2½ hours.

If you prefer, you can set a starting time for the program; this will enable you to prove the dough overnight, and next morning, when you wake up, you will have freshly proved dough waiting to be cooked.

At the end of the proving program, place them in an oven for 15 minutes at 175°C and a magnificent aroma will fill your kitchen.


Abbattitore_Casalingo_abbattitore_domestico_Brioches


AUBERGINE ALLA PARMIGIANA MIGNON

INGREDIENTS

  • 2 average size aubergines
  • 300 g of cherry tomatoes
  • 300 g of mozzarella
  • Flour
  • Breadcrumbs
  • 2 eggs
  • salt
  • Oil
  • basil
  • Parmigiano Reggiano
  • Oil for frying
  • 50 ml of milk
  • Single portion aluminium dishes

With the LIFE domestic blast chiller you can prepare tasty single portions of Aubergine alla Parmigiana!
How often do your children come from school hungry? In only a few minutes you will have a homemade, healthy dish ready for them to eat.


PREPARATION

Peel the aubergines, cut to 1 cm thickness and coat with flour, ensuring that the whole surface is covered.
Slice the mozzarella, and dice the tomatoes and add a olive oil and basil dressing
Whisk the eggs, adding the milk and then coat the slices of aubergine with the liquid before covering them with breadcrumbs.

Pre-cool the LIFE blast chiller to -20°C

Heat the oil in a saucepan. Fry the aubergines and dry with absorbant paper to remove the excess oil.

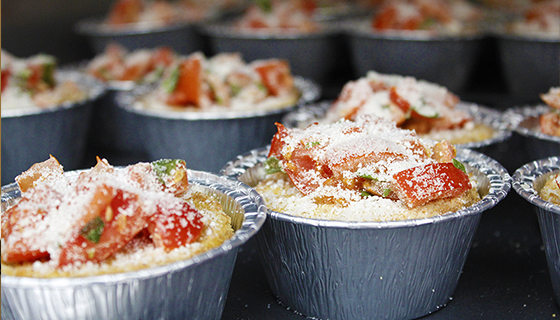
Place the aluminium dishes on the racks supplied with the LIFE domestic blast chiller and place a slice of fried aubergine, a slice of mozzarella and some diced tomatoes in each one. Continue to fill the dishes in the same way, then finish with a generous portion of grated parmigiana.

When the LIFE blast chiller has pre-cooled activate the function DEEP FREEZING>VEGETABLES>FULL and use the temperature of probe.
When the cycle has concluded preserve the dishes in your freezer.

When you want to serve them, set the oven to 180°C and cook for 15 minutes. Remember there is no need to defrost them before cooking!
Buon Appetito!


FRUIT SORBET AT -40°C

INGREDIENTS

  • 2 apples
  • 1 orange
  • 1 red orange
  • 1 lemon
  • 1 lime
  • 250 g of blackberries
  • 250 g of raspberries

Have you ever thought of eating fruit at -40°C? Thanks to the LIFE domestic blast chiller it is now possible!
It will be a real surprise for your guests and a innovative solution for encouraging your children to eat fruit.


PREPARATION

Wash the fruit thoroughly, and thinly slice the apples, oranges, the lemon and the lime.
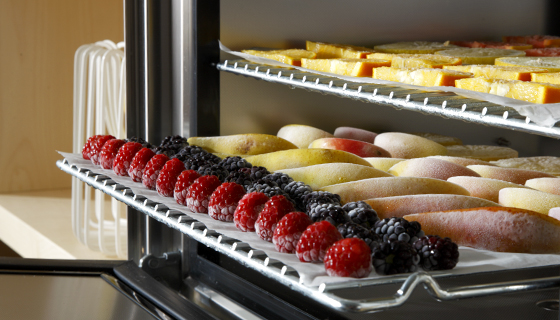
Line the LIFE blast chiller racks with baking paper. Order the sliced fruit neatly on the racks, along with the raspberries and blackberries. To avoid pieces of fruit sticking to each other ensure they don’t ovrerlap.

Place the racks in the LIFE blast chiller and activate the deep freezing function:
DEEP FREEZING>TIME>FRUIT>SLICES
Set the time according to the quantity of the fruit and press START. Very quickly, the fruit will be deep frozen at -40°C.

They can be consumed as soon as the deep freezing program has finished: thanks to the microcrystallisation of the water, the fruit will not be hard, and will be a delight to eat. You will have created a pleasing and tasty way of serving fruit at -40°C that will surprise and delight your guests and children!